Non-fungible tokens (NFTs) gained immense popularity and developed their own subculture in 2021. There’s a good chance you have heard about them unless you’ve not been paying attention.
From Paris Hilton and Nike to LeBron James and the NBA, celebrities and major brands are launching their own exclusive ‘drops’ and splurging millions on NFTs. As of 2022, artists and designers continue to flood the NFT space in huge swathes.
Why? NFTs can be quite lucrative. Creators like Trevor Jones and Beeple (Mike Winkelmann) make millions from NFT sales. For instance, Beeple’s Everydays: The First 5000 Days recently sold for $69 million at Christie’s. The sale placed him “among the top three most valuable living artists.â€
So yeah, no judgment if you’re solely investing in NFTs towards financial freedom. Regardless, NFTs are so much more than speculation.
It’s unsurprising if all the noise around NFTs makes you wonder, “Something must be working, right?†Or is it just a well-oiled machination of good PR, hype, and buzz?
Either way, this article will take you into the world of NFTs from a creator’s viewpoint. I’ve created a step-by-step guide on minting your first NFT as a complete newbie.
Read on to learn how to turn your awesome art into NFTs and sell them in minutes.
But first —
Step 0: “I Don’t Know What an NFT Is.â€
You’re reading this article, so I assume you know what NFTs are already, right?
“No�
Say you didn’t; here’s a quick intro to NFTs and what they entail. Of course, feel free to skip this step if you do.
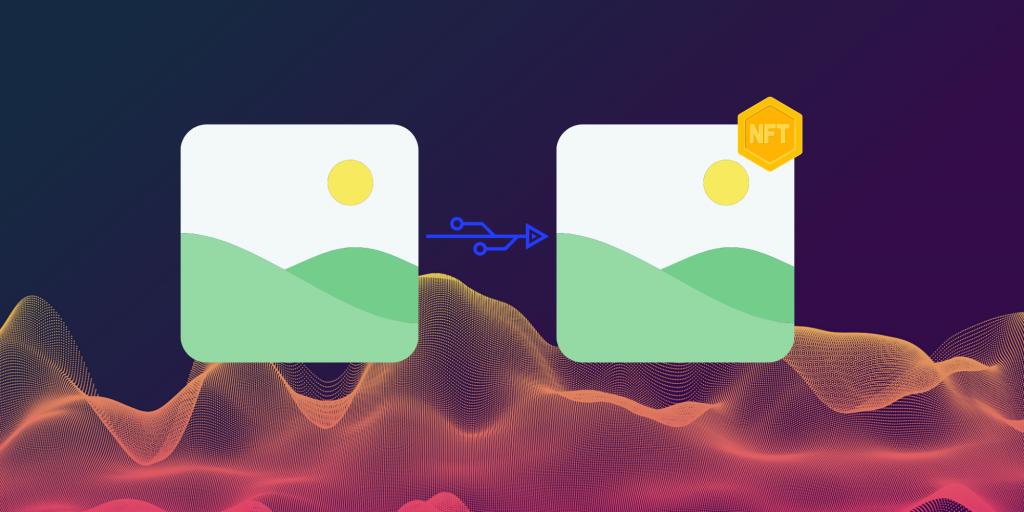
NFTs are digital collectibles stored on the blockchain. Usually, real-world collectibles like artworks and antique items are auctioned along with a certificate of authenticity. Well, NFTs work almost the same way, only they exist in digital formats.
NFTs allow you to ensure digital files (think pictures, videos, GIFs, and audio) exist as a sole unique copy. With NFTs, you can verify ownership for digital content, a laudable feat in itself.
NFTs themselves are rarely stored on the blockchain. Instead, the blockchain mints a unique token representing the file ownership and stores a reference to the actual file. “Minting†occurs when you turn your art into an NFT; you’re essentially creating a unique token on the blockchain that represents the art.
And with that out of the way, let’s move on to the next step: choosing a platform.
Step 1: Choose a Platform to Sell Your NFT on
NFT platforms and marketplaces are steadily growing in number, each with different features and fee models.
Instead of running through a long list of marketplaces (which would be exhaustive), we’ll list some beginner-friendly ones that will allow you to mint your first NFT easily.
Some of the biggest NFT marketplaces include OpenSea, Rarible, SuperRare, Mintable, NFT ShowRoom, Foundation, NBA Top Shot Marketplace, Axie Marketplace, and Nifty Gateway.
You can research each marketplace to decide which one is right for you. However, for this guide, we’ll be focusing on OpenSea since it’s a pretty good place to start for beginners — and Rarible, too.
OpenSea is a popular, beginner-friendly platform for buying and selling NFTs. There are no restrictions on who can be a creator, and you can mint NFTs without coding knowledge. OpenSea was one of the earliest marketplaces featuring all kinds of NFTs, from digital art to in-game items.
What’s better? OpenSea introduced “lazy minting.†This feature helps you avoid high transaction fees on the Ethereum blockchain (Rarible supports this too). You can upload your art, mint your NFT, and put it up for sale without paying expensive ‘gas’ fees.
OpenSea bundles gas fees with the bid price when a collector buys your art. That way, you can avoid paying to mint an NFT no one eventually picks up.
(Just looking out for you. Okay, I’ll see myself out now.)
Now, let’s try to set up a wallet for your NFT adventures.
Step 2: Set Up a Crypto Wallet (and Buy Some Crypto)
The NFT market exists within the larger crypto space. You’ll need a compatible crypto wallet to buy, sell, and create NFTs, and interact with marketplaces. You’ll also need a wallet to pay listing fees on the marketplace and get paid in crypto when someone buys your art.
Thankfully, tons of crypto wallets are available for you to buy and store NFTs. Some popular wallets like MetaMask, Rainbow, and Coinbase Wallet are compatible with most marketplaces.
MetaMask is an excellent option for beginners, with over a million users worldwide. The wallet is available as a browser (Chrome and Firefox) extension and iOS/Android app. MetaMask connects easily with most NFT marketplaces, plus it has a straightforward setup process.
Again, feel free to skip ahead to step three if you’ve set up one of the recommended wallets.
Visit the MetaMask download page and download the browser extension or mobile app to get started. Once MetaMask is installed, click/tap the Create New Wallet button. You’ll receive a prompt to set a password (ensure it’s secure and easy to remember).
Finally, MetaMask will generate 12 random words; a “seed phrase.†I wouldn’t worry too much about its meaning — just remember it’s essential to keep it safe. You’ll need the phrase if you’re locked out of your account or need to recover your wallet on a new device.
After you back up the recovery phrase, you’ll receive a prompt to re-enter it in the same order. Then, simply accept the terms, and your wallet is up and running. Once you’ve set up your wallet, you may want to consider buying crypto. You can grab some Ethereum (ETH) — just enough to cover gas fees.
Now that you’ve set up a compatible wallet (and bought some crypto), it’s time to upload your digital file on the marketplace.
Step 3: Create Your NFT
As I mentioned earlier, there are several marketplaces where you can sell your NFT. Again, we’ll go with OpenSea for illustrative purposes, but the entire process is relatively straightforward for other marketplaces.
To get started, visit the OpenSea website and click/tap the Create button in the navigation. You’ll receive a prompt to connect your wallet using the available wallet providers.
Select the MetaMask option and approve the signature request in your wallet. Something to keep in mind: you’ll have to reconnect after 24 hours to keep your wallet safe.
Voila! The Create New Item screen.
You’ll need to upload the digital file and fill in information about your NFT. OpenSea accepts JPG, PNG, GIF, SVG, MP4, WEBM, MP3, WAV, OGG, GLB, and GLTF formats, up to 100 MB maximum.
Now would be a good time to let the creative juices flow. Pick a nice name and provide a detailed description of your item. You can also add an external link so users can learn more about the NFT.
You can ignore the Properties, Levels, and Stats fields for now. They make up the NFT metadata, but you often don’t need them unless you’re selling something like in-game items or characters.
Toggling Unlockable Content will allow you to include an access code or link that only the NFT owner can reveal. Go ahead and toggle Explicit & Sensitive Content if you plan to upload some steamy pictures on OpenSea. By doing this, you’ll mark your item as NSFW and remove it from safe search results.
Select Ethereum in the Blockchain dropdown and set your supply to 1 since you’re minting a one-of-one NFT. Note that you won’t be able to modify the blockchain once you’ve created the NFT.
You can also sell your NFT on OpenSea with the Polygon network. Of course, you can avoid paying fees outright if you do this, but there’s a catch. Collectors won’t be able to buy your NFT using the Ethereum network, and they’ll need to migrate their crypto over to Polygon.
Bottom line: extra gas fees and stress — you decide if it’s worth it.
Review the information and click Create to continue. You’ll see a yay! popup once you’ve created your NFT.
But it doesn’t end there. You probably guessed that, right?
You’ve just created your NFT, but OpenSea hasn’t listed it — at least not yet. Close the screen, and you can get to work on selling your NFT.
Click the blue Sell button on the item’s page (you can also go to your account and select your NFT in the Created tab). You have two listing options with NFTs created on Ethereum; a fixed price listing and a timed auction (Polygon only has the first option).
The fixed price option is self-explanatory; you set an exact price for the NFT in ETH. Also, you’ll have to specify for how long the listing will remain available. The default duration is a day, three days, or a week, but you can set a custom duration in the calendar popup.
Your item becomes available for sale immediately you list it. So, what if you already have a deal with a buyer? You can lock in the NFT for them by pasting their address into the Reserve for specific buyer field.
Okay, let’s move on to auctions.
The timed auction is more complex, but it can be an exciting way to sell your NFT. OpenSea has two auction types: an English auction and a Dutch auction.
The English auction allows you to sell to the highest bidder. You can complete the sale yourself if the highest bid is below 1 ETH, but you don’t have to. However, OpenSea automatically completes the sale and pays the gas fees if the final bid is above 1 ETH.
With a Dutch auction, like a fixed price listing, you set a starting price and an ending price. The price falls towards the ending price over the duration you set.
Unlike fixed-price listings, buyers bid with Wrapped ETH (WETH) in timed auctions. You can choose to accept bids at any time or even cancel the auction (you’ll pay a gas fee to do that, though).
Finally, click the Complete Listing button to put your NFT up for sale. You’ll have to sign a transaction with your wallet, either using the browser extension or the app, leading us to a nifty little problem. You’ve not sold an NFT on OpenSea before (most likely), so you’ll need to initialize your wallet by paying a one-time gas fee.
Remember that crypto you bought earlier? Well, it might come in handy now.
Once you click on Complete Listing, a “Register Proxy†transaction will appear in MetaMask. The gas fee fluctuates depending on the current network conditions. (Pro tip: You can monitor Ethereum gas fees and save money with Etherscan’s gas tracker.) You’ll see a signature request to approve the listing in your wallet, and after that, you’ll be able to finalize the sale.Â
Final Thoughts
If you completed the necessary steps, the NFT will now appear in your OpenSea profile. Your entire NFT trading history is publicly available on the blockchain forever, so you can easily track the price movement. No doubt, creating an NFT can be a complicated process, but you might be motivated by the profit potential.
I’ve covered the basics points you need to note while creating NFTs. Now it’s up to you to bring your imagination to life, create beautiful art, and market your NFT to the crypto community.
